🚀Astro and Sanity are both excellent solutions in their own right; Astro being a beginner-friendly Javascript framework, primarily focusing on building static websites by default. Sanity.io is a Content Management System (CMS) with a generous free tier.
In this guide we’ll be using Astro and Sanity to build a functional blog, with an additional challenge at the end to let you practice what you’ve learned.
I’ll cover how to setup Astro and Sanity, and link the two, as well as how to fetch data from the Sanity Content Lake.
If you’re interested in seeing a project made with Astro and Sanity, I have made a live demo site. Visit the Github repo, if you’re interested diving into the code.
Table of content
- Sanity Studio
- Astro
- Server-Side Rendering in Astro
- Sanity client
- GROQ
- Card Slug and Date
- Dynamically Generated Pages
- Images
- Portable Text
- Author Name
- Deployment
- Sanity Account Management
- Conclusion
- Where to go from here?
Sanity Studio
The use of Sanity are separated into two aspects; one is Sanity Studio where you can edit content from Sanity’s so-called Content Lake. The other is the Sanity client. The Sanity client is a working with Astro to fetch data from the Content Lake at build time.
To start with, we need to sign up to your account on Sanity.io.

Once you have created an account, we can jump into our code editor.
For the sake of simplicity, this project will be setup as a single project containing both the frontend code (Astro) and the backend (Sanity Studio), however this can just as easily be two separate projects if you prefer.
In our project we will make two directories:
appfor Astrosanity-studiofor Sanity Studio
Now open your terminal (Ctrl + J) and go to the sanity-studio directory with
cd sanity-studioHere we install the Sanity Studio with
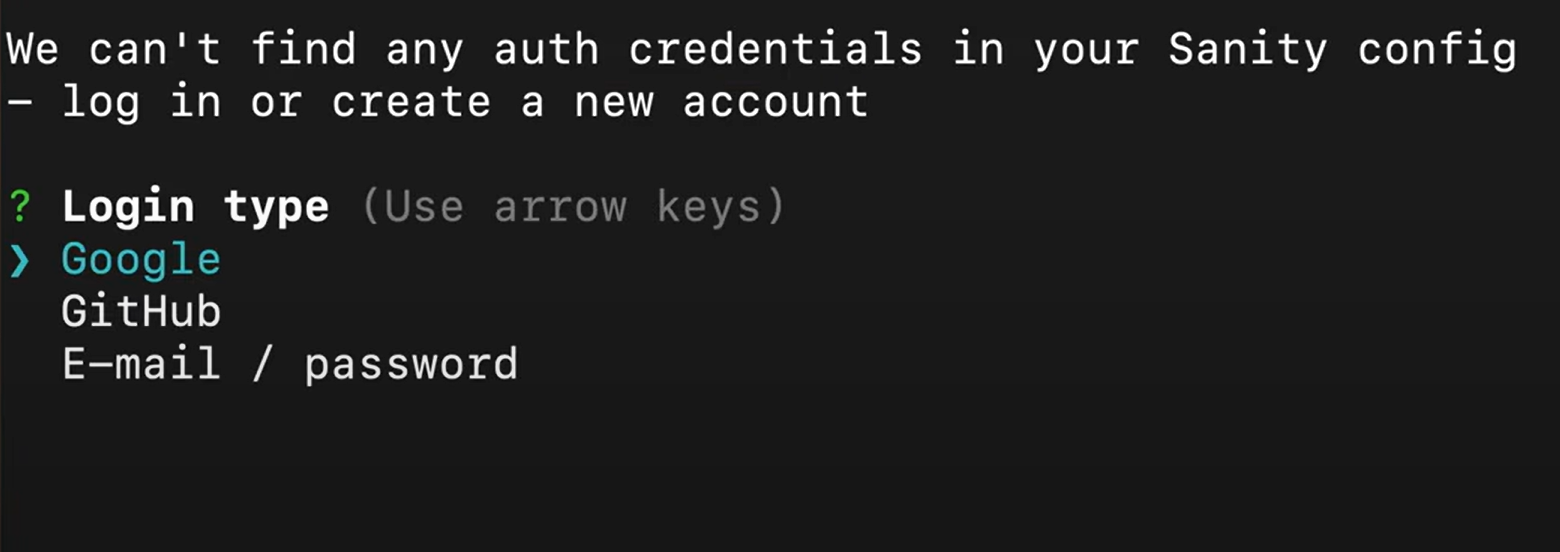
npm create sanity@latest -- --template blog --dataset production --visibility publicIf this is your first time using Sanity, you’ll be asked to login with Google, Github or e-mail.

Go ahead and create a new project. Once the install is done, you can check out the project at http://localhost:3333/ with
npm run devGo ahead and make at least one author and one post, so we have something to work with on the frontend. Make sure you publish all the posts and authors you create. Any unpublished content and changed are saved in “draft” objects.
In this tutorial we won’t be using the “Category” schema, so no need to create categories.
Astro
Now we are ready to setup our frontend with Astro.
Go to your app directory and run
npm -y create astro@latest -- --template minimal --installAt last we’ll make a our main blog overview page in pages/index.astro.
Server-Side Rendering
Astro is by default a static site generator, however we want our site to be server-side rendered (SSR) in order to get the most recent data from Sanity on each request.
Astro makes it very easy to change to SSR: in your astro.config.mjs, simply add output: "server", and add the plugin for your hosting provider with
npx astro add vercelor
npx astro add netlifySanity Client
Now we’re done with the basic setup for Astro, the only thing missing is how we connect to out Sanity Content Lake.
We do that with the Sanity client with
npm install @sanity/clientLet’s put the Sanity client in its own folder in the app directory, and call it sanity.
In the app/sanity directory create a client.ts and api.ts files. In the client we define the configuration for our Sanity account and project:
import { createClient, type ClientConfig } from "@sanity/client";

const config: ClientConfig = {
  apiVersion: "2023-05-03", // use current date (YYYY-MM-DD) to target the latest API version

  projectId: "", // can aslo be found in your Sanity Studio config file
  dataset: "", // can aslo be found in your Sanity Studio config file

  // if you use environment varibales, you can use below instead:
  // projectId: import.meta.env.SANITY_PROJECT_ID,
  // dataset: import.meta.env.SANITY_DATASET
};

export const client = createClient(config);
In api.ts we put all the api call to the Sanity Content Lake, let’s start by adding a getPosts-function:
import { client } from "./client";

export async function getPosts() {
  const posts = await client.fetch(
    `*[_type == "post"]{
      title,
    }`
  );
  return posts;
}
Let’s check that it works, by calling the getPosts() in index.astro
---
import { getPosts } from "../../sanity/api";

const posts = await getPosts();
---

<div>
  {posts.map((post) => <p>{post.title}</p>)}
</div>
Now you should be able to see all the blog post titles that you created in Sanity Studio.
At this point, we’ve got Sanity Studio set up in sanity-studio, and our Astro frontend in app, where the sanity client is connected to the Sanity account’s Content Lake. We’ve got an pages/index.astro with our blog post titles.
To further populate the page with our content, we need to expand our api calls.
GROQ
Sanity uses GROQ, Sanity’s own query language.
To begin with you can think of it as conditional(s) in the square brackets [], and datapoints within the curly brackets {}. Remove the {} to get all datapoints.
You can test your GROQ queries in your Sanity Studio Vision tools.
I recommend that you have a look at Sanity’s GROQ cheat sheet.
Card Slug and Date
Let’s get on with our blog overview page, by making each blog post into a card with publishing date and a button linking to the blog post.
First we need to add the post slug and publishing date to our query to use on the frontend
import { client } from "./client";

export async function getPosts() {
  const posts = await client.fetch(
    `*[_type == "post"]{
      title,
      publishedAt,
      "slug": slug.current,
    }`
  );
  return posts;
}
Then we can use it in the card
---
import { getPosts } from "../../sanity/api";

const posts = await getPosts();
---

<div>
  {
    posts.map((post) => (
      <div>
        <p>{post.title}</p>
        <time datetime={new Date(post.publishedAt).toISOString()}>
          {new Date(post.publishedAt).toLocaleDateString("en-us", {
            year: "numeric",
            month: "short",
            day: "numeric",
          })}
        </time>
        <a href={post.slug}>Read</a>
      </div>
    ))
  }
</div>
The anchor will result in 404-error at this point, since we haven’t setup the dynamic blog post pages yet. Let’s do something about that.
Dynamically Generated Pages
Now it’s time to create the dynamically generated pages in Astro, and for that we need more data from the Content Lake
import { client } from "./client";

export async function getPosts() {
  const posts = await client.fetch(
    `*[_type == "post"]{
      title,
      publishedAt,
      "slug": slug.current,
      body,
      "image": mainImage.asset -> url
    }`
  );
  return posts;
}
Note that we are getting the image via a reference to another object. To get access to reference’s data you must use the -> arrow.
Now let’s make the dynamically generated pages by making a file called [...slug].astro, and add some boilerplate for generating the pages, and copy the elements we used for the card in index.astro.
---
import { getPosts } from "../../sanity/api";

const { slug } = Astro.params;
const posts = await getPosts();
const page = posts.find((post) => post.slug === slug);
if (!page) return Astro.redirect("/404");

const { title, publishedAt, body, image } = page;
---

<article>
  <h1>{title}</h1>
  <time datetime={new Date(publishedAt).toISOString()}>
    {
      new Date(publishedAt).toLocaleDateString("en-us", {
        year: "numeric",
        month: "short",
        day: "numeric",
      })
    }
  </time>
</article>
Portable Text
Let’s start by adding the body text. The body is saved as Portable Text, this allows the text to keep the information about formatting etc. from the text editor in Sanity Studio.
To use Portable Text in Astro is fairly simple:
Install the Portable Text package
npm install astro-portabletextThen we add the body in the astro-portabletext element
---
import { getPosts } from "../../sanity/api";
import { PortableText } from "astro-portabletext";

const { slug } = Astro.params;
const posts = await getPosts();
const page = posts.find((post) => post.slug === slug);
if (!page) return Astro.redirect("/404");

const { title, publishedAt, body, image } = page;
---

<article>
  <h1>{title}</h1>
  <time datetime={new Date(publishedAt).toISOString()}>
    {
      new Date(publishedAt).toLocaleDateString("en-us", {
        year: "numeric",
        month: "short",
        day: "numeric",
      })
    }
  </time>
  <PortableText value={body} />
</article>
Tip: If you use Tailwind, you can style Portable Text with the Typography Plugin.
Images
To add images we need to use the image builder from Sanity’s image url package
npm install @sanity/image-urlNow let’s make a new file in our sanity client directory called image.ts
import imageUrlBuilder from "@sanity/image-url";
import { client } from "./client";

const builder = imageUrlBuilder(client);

export function urlFor(source) {
  return builder.image(source);
}
With the image builder, we can chain methods for our the CDN to the image such as width(number), blur(value), and fit(string). For this guide, we’ll only use url().
Now that we can access our image builder function throughout our project, let’s add it to our pages/[...slug].astro.
---
import { urlFor } from "../../sanity/image";
import { getPosts } from "../../sanity/api";
import { PortableText } from "astro-portabletext";

const { slug } = Astro.params;
const posts = await getPosts();
const page = posts.find((post) => post.slug === slug);
if (!page) return Astro.redirect("/404");

const { title, publishedAt, body, image } = page;
---

<article>
  <img src={urlFor(image).url()} />
  <h1>{title}</h1>
  <time datetime={new Date(publishedAt).toISOString()}>
    {
      new Date(publishedAt).toLocaleDateString("en-us", {
        year: "numeric",
        month: "short",
        day: "numeric",
      })
    }
  </time>
  <PortableText value={body} />
</article>
Author Name
As a final touch, let’s add the author’s name to the blog post. First we need to get it from the api.ts
import { client } from "./client";

export async function getPosts() {
  const posts = await client.fetch(
    `*[_type == "post"]{
      title,
      publishedAt,
      "slug": slug.current,
      body,
      "image": mainImage.asset -> url,
      "authorName": author->name,
    }`
  );
  return posts;
}
Now we can access authorName in the frontend
---
import { urlFor } from "../../sanity/image";
import { getPosts } from "../../sanity/api";
import { PortableText } from "astro-portabletext";

const { slug } = Astro.params;
const posts = await getPosts();
const page = posts.find((post) => post.slug === slug);
if (!page) return Astro.redirect("/404");

const { title, publishedAt, body, image, authorName } = page;
---

<article>
  <img src={urlFor(image).url()} />
  <h1>{title}</h1>
  <p>{authorName}</p>
  <time datetime={new Date(publishedAt).toISOString()}>
    {
      new Date(publishedAt).toLocaleDateString("en-us", {
        year: "numeric",
        month: "short",
        day: "numeric",
      })
    }
  </time>
  <PortableText value={body} />
</article>
Deployment
To deploy an server-side rendered Astro project, you need to add an adapter to your project. Luckily, this is very easy! Find your adapter and install with
npx astro add [adapter-name]Sanity Account Management
All that’s left to do is access management to the Sanity Studio if you are building a site for someone else, you may wish to give them the ability to use Sanity Studio, so they can easily create new blog posts, authors, or whatever documents and fields you have made.
You can give access as Viewer, Editor or Administrator, or make your own roles. To give access, go to Sanity’s Project Management and invite a user by typing their e-mail.
Conclusion
🎉**Congratulations!**🎉
If you followed along, you should have a functional main page (pages/index.astro) with an overview of all the blog posts.
You have individual pages (pages/[...slug].astro) for each blog post with images, regular text strings, dates, and Portable Text.
Where to go from here?
Now that you know how to build the foundation, I recommend that you add styling, and adding your own schema in Sanity Studio to make it fit your own content.
As an additional challenge, you can take what we’ve made in this tutorial, and make dynamically generated pages for each author.
If you need inspiration or help, I have made a live demo site. Visit the Github repo, if you’re interested diving into the code.
